Guest walkthrough
Exp1 — guided tour: end-to-end path to sign-in with the Acme demo app
A sequenced set of admin, mobile, and demo steps to judge Ezkey on one coherent scenario.
Audience: people invited onto exp1 who are comfortable with a technical UI — not a novice consumer audience.
Figures mirror each numbered step.
What this guide is for
This walkthrough is for a person invited onto exp1 who wants to explore Ezkey: a technical profile (engineering colleague, product or security team, specialist press, and similar).
Goal: experience a full Ezkey path, from first contact with the console through successful mobile-backed authentication, using an integrated demo application on the exp1 setup.
On arrival, an operator will have prepared the basics: a tenant, deferred activation, and communication of the activation code. If you used instant preview signup, your code was shown once on that page; open the Admin UI at exp1-admin-ui.ezkey.org. This guide then describes a scripted sequence.
Where to open in the browser: the Admin UI URL for your tenant is sent together with your activation code when you are onboarded onto exp1—it is not a public bookmark on ezkey.org. The Acme demo app for this walkthrough is public: https://exp1-demo-acme.ezkey.org/login (sign-in page for ACME Inc powered by Ezkey; use Configure API Key there before Login with EZKey).
Once the steps feel familiar, spend a few minutes on the tenant dashboard in the Admin UI — we return to that at the end.
No Ezkey mobile app? Use the Demo Device
The Ezkey mobile app is still in limited internal testing and is not generally available to anonymous evaluators. Until a public mobile release ships, you can complete this walkthrough with the Ezkey Demo Device — a standalone simulated phone, published on GitHub and runnable locally:
github.com/mgagp/ezkey-demo-device
- Run it with Docker (see the repo README); by default it targets the exp1 Auth API and opens at localhost:3080.
- It follows the same enrollment and approval cryptography as the mobile client for demonstration purposes.
- It is not production software — a demo assist tool only. It does not provide the device-backed protections of a real phone, in particular Secure Storage and StrongBox (Android hardware-backed key storage) that the mobile app is designed to use.
Throughout this guide, wherever we say “mobile app”, the Demo Device is the practical substitute on exp1 for self-service evaluators.
Main flow (overview)
- Activate Tenant Admin access (activation code, then mobile association from the sign-in screen — use the Ezkey mobile app or the Demo Device).
- Create an integration (first business action in the Admin UI).
- Create an API key for that integration; keep the id and secret exactly as shown at creation time somewhere outside the browser, per your team OS and habits.
- Create an enrollment and bind it to the mobile or Demo Device (QR scan + six-digit challenge confirmation).
- In a different browser (private window or separate profile), open the Acme demo at exp1-demo-acme.ezkey.org/login, supply the API key through Configure API Key, then start a sign-in with the user identifier tied to the enrollment.
- On the phone or Demo Device: review and approve the request within the demo countdown window.
If everything lines up, the demo app should show a lightweight session screen — pseudo-application UI with a sign-out affordance — signaling that the full path succeeded.
Why integration before the API key (and where the demo fits)
The Admin UI steers the organization: integrations, enrollments, admins, and more. For a “real” application to talk to Ezkey services, the normal pattern is a backend using the Integration API and API keys for machine-to-machine flows.
- Once an integration exists, your primary automated counterparty is the integrated application — not only Admin UI screens.
- On exp1, the Acme demo app at exp1-demo-acme.ezkey.org/login plays the integrated-app role so you can exercise the cycle without building a full app first.
- The same Integration API patterns power real backends; the project includes a Java SDK (used by the demo among other clients). Packaging and availability follow the timeline described on ezkey.org.
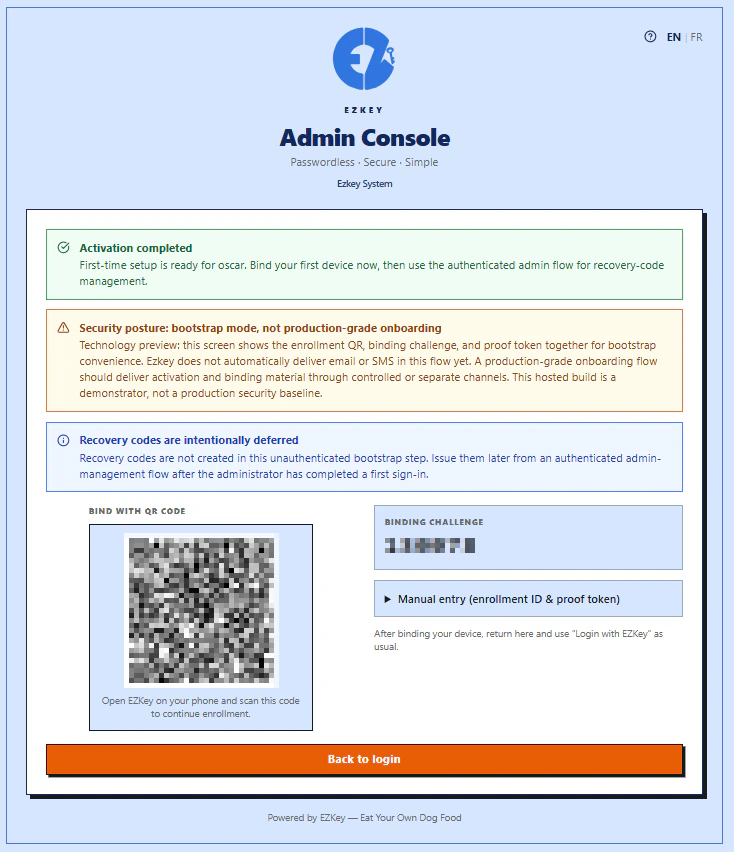
Step 1 — Activate Tenant Admin access (activation code + mobile)
Open the Admin UI using the URL you were given with your activation code, and reach the sign-in screen.
- Enter the activation code provided by the operator (deferred activation on the Global Admin side).
- Follow the flow to associate the phone: scan the QR with the Ezkey mobile app or the Demo Device (localhost:3080) and complete the on-screen steps.
Step 2 — Create an integration
Go to the integrations section, then create an integration with the fields exp1 requires (labels and functional identifiers per the form).
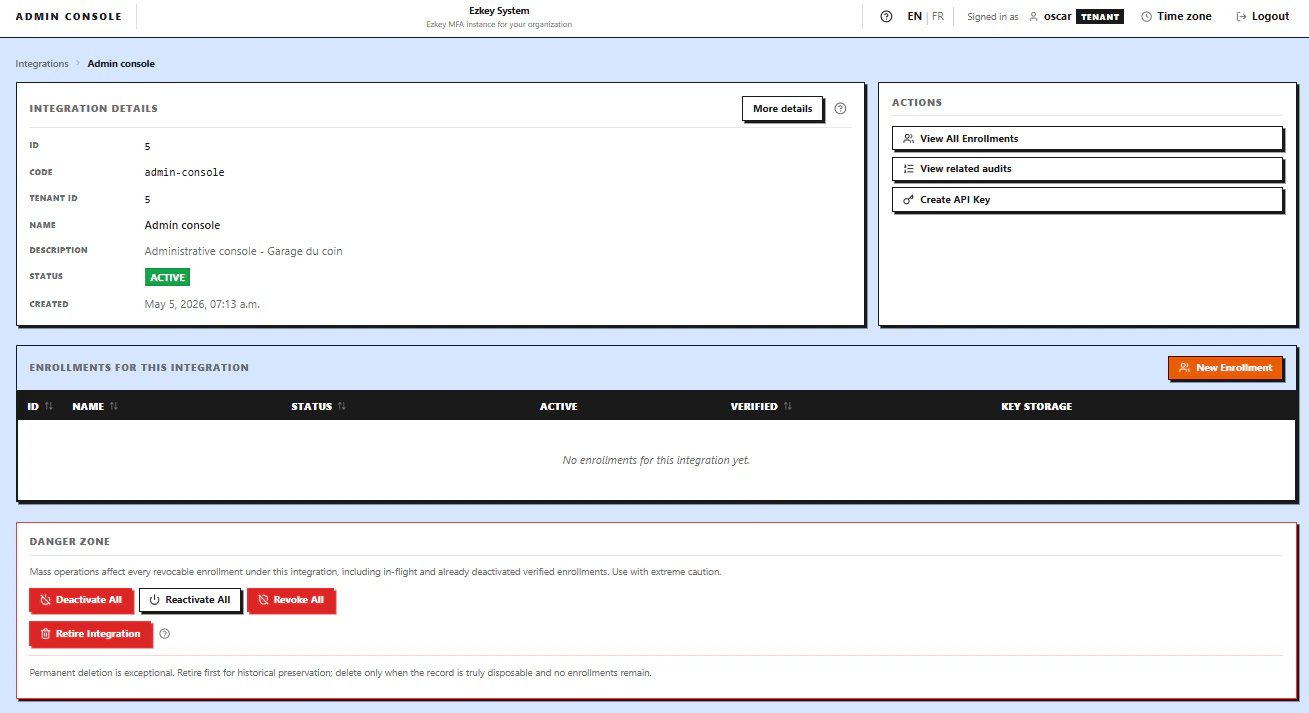
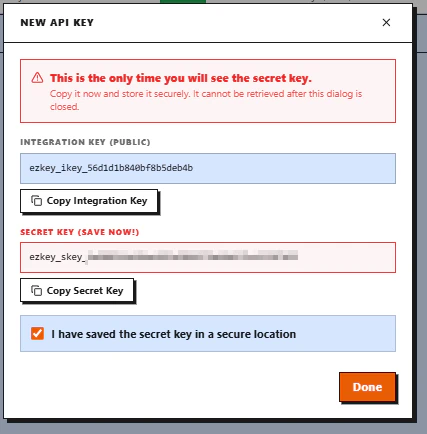
Step 3 — Create an API key for that integration
From the integration context:
- Start creation of an API key.
- When the UI shows id + secret (machine secrets), copy and store them outside the browser immediately; you generally cannot retrieve the raw secret the same way later.
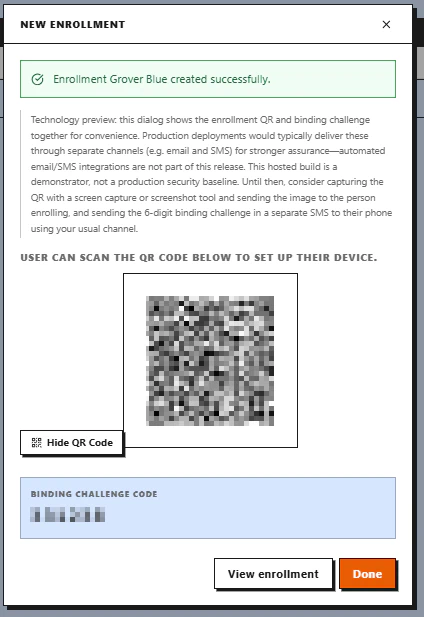
Step 4 — Enrollment: QR + six-digit challenge
Create a new enrollment attached to the integration. When the product shows QR + numeric challenge (for example six digits), on the mobile app or Demo Device: scan, then enter.
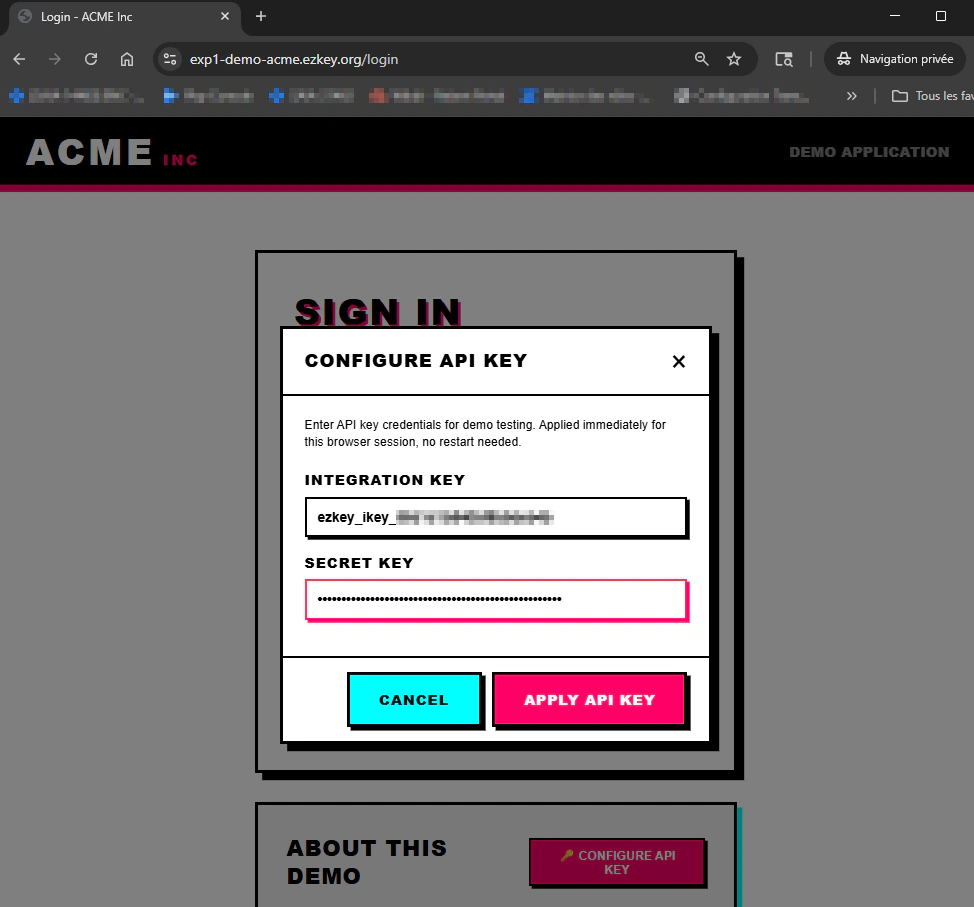
Step 5 — Acme demo app: enter the API key (other browser)
Open a new window or private browsing so Tenant Admin session and integrated-app role do not mix.
- Open https://exp1-demo-acme.ezkey.org/login in that separate browser session.
- Use Configure API Key and enter the integration key and secret from your Admin UI (the demo holds them only for this browser session).
- Continue with Login with EZKey after the key is applied.
In your own integration, treat keys as server-side secrets—not something end users paste into a page.
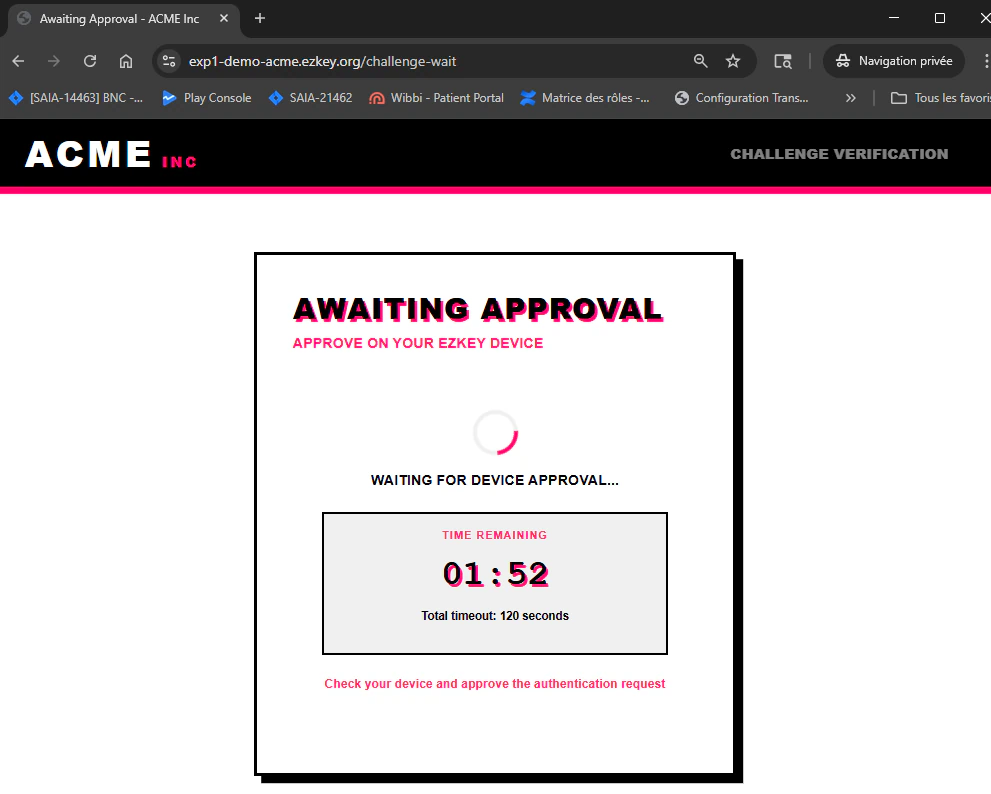
Step 6 — Sign-in with the enrollment user, mobile approval
On the demo: start a sign-in with the user identifier tied to the enrollment (as shown in enrollment detail in the Admin UI).
On the mobile app or Demo Device: open the pending request, then approve within the window shown by the demo.
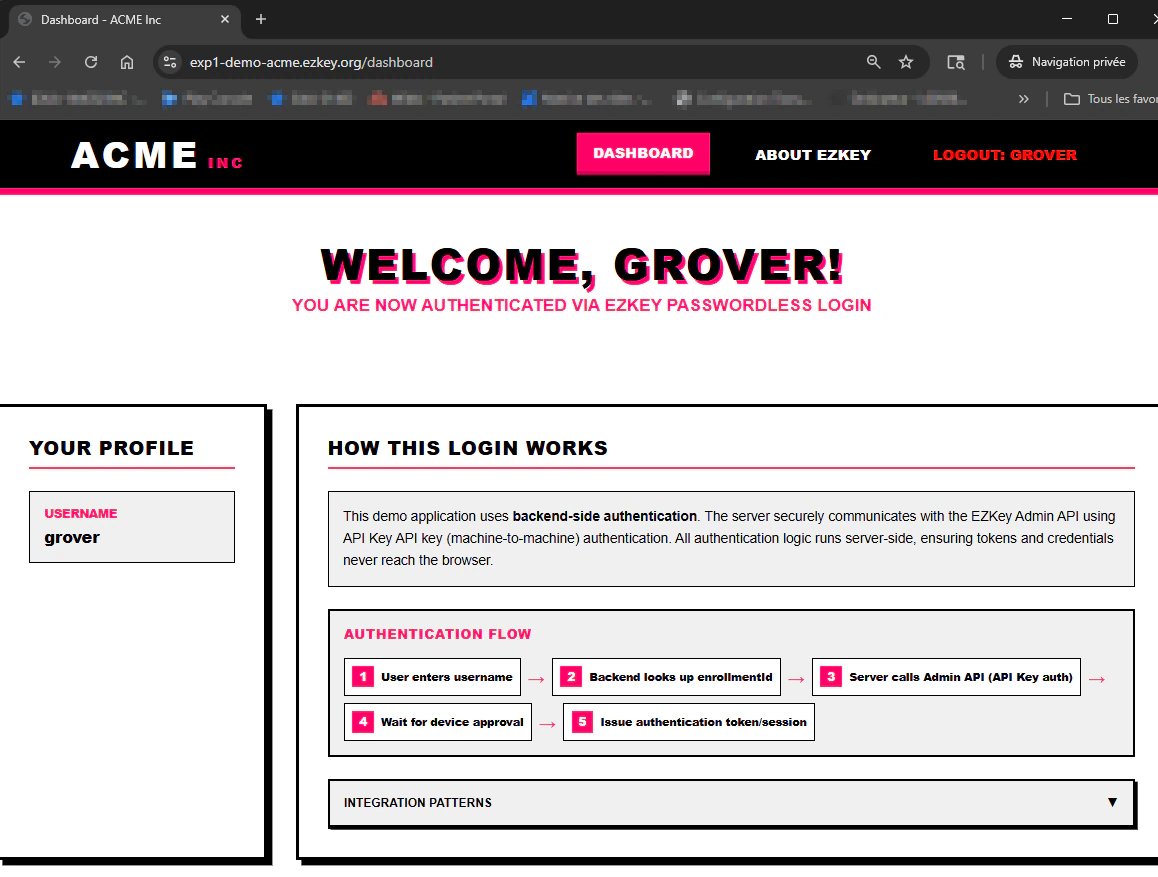
Step 7 — Session established on the demo
After approval on the phone, the demo should advance to an active session view (pseudo-application) with sign-out available depending on screens.
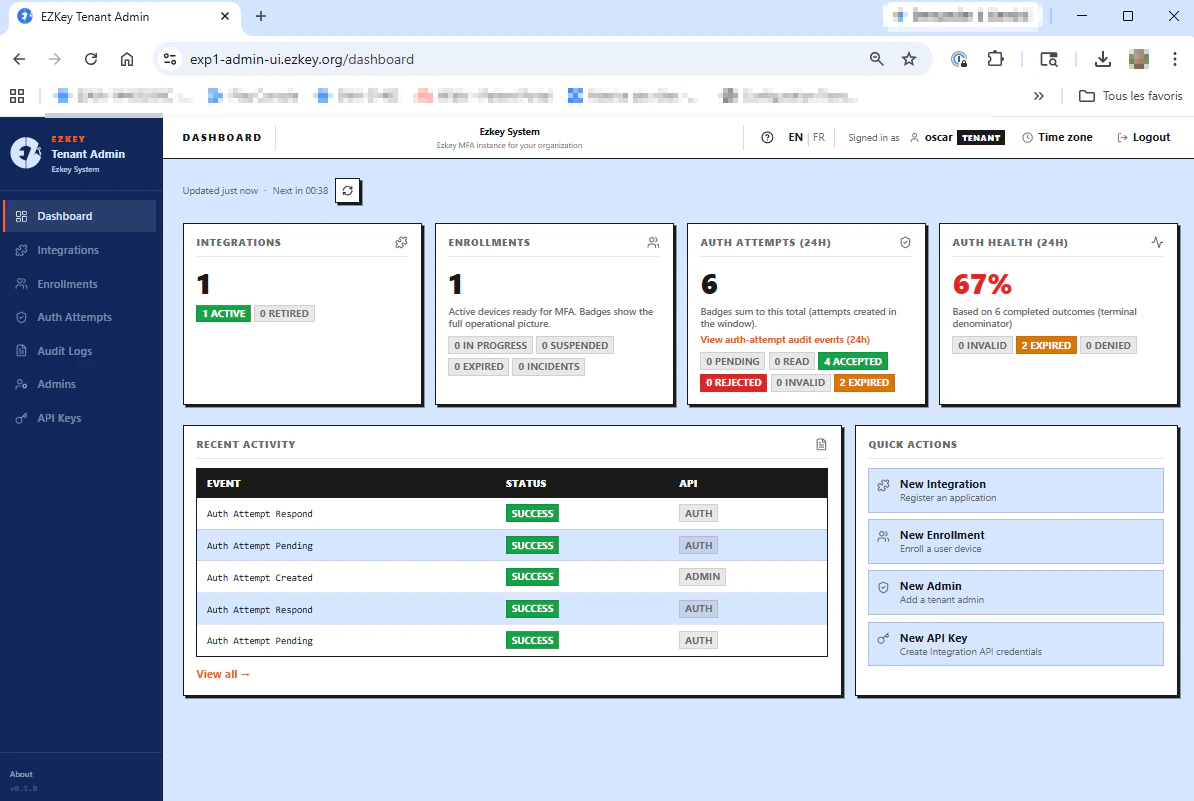
Afterward: tenant dashboard
Return to the tenant dashboard in the Admin UI: it summarizes activity and links into the other sections you used in this walkthrough.
At a glance
| Step | Main narrative role |
|---|---|
| 1 | Unlock Tenant Admin; bind the phone (app or Demo Device). |
| 2 | Anchor Ezkey in an application perimeter. |
| 3 | Machine credentials (Integration API key). |
| 4 | Enroll the device (QR + challenge on exp1). |
| 5–7 | Drive through MFA request to demo success. |
This path does not exhaust the product; it offers a useful functional sequence for a guest who wants to judge Ezkey before projecting further.